How to Upgrade to Di2
Making the Shift to Di2
After having my current road bike for 5 years I finally decided to upgrade to Di2. I was contemplating getting a new frame and building that up but since my CAAD10 is already Di2 compatible it just made more sense (to me) to go upgrade it. My position is pretty well dialed on it and I’m not too keen on paying the current going rate for bikes these days so off I went to ebay to source some new electronic goodies.
Background
My CAAD10 came stock with a Shimano Ultegra 6800 groupset, except for the cranks, which are C’dale Hollowgrams paired with FSA rings. That setup meant I only needed to swap in Di2-compatible derailleurs, shifters, battery, junctions, and cables. To help keep costs down I stayed with Ultegra. Other than saving a few grams I saw no benefit to Dura-Ace. Now I did float the idea of SRAM eTap as that would make installation a ton easier, but 2×11 groupsets aren’t easy to come by and they cost a premium, so Shimano it was.
My choices were either the older generation 6870 group set or the newer 8050 group set. It seems shifting performance between the two were about the same (from reviews I read) with the biggest differences being the more customizable syncro-shift (i.e. auto shifting) and thinner hoods with better covers on the 8050 series. So with that bit of info it was off shopping for 8050 series parts where necessary, which is just basically the derailleurs and shifters, everything else is the same for all groupsets.
When all was said and done I was north of $1000 for all the parts. Now keep in mind, I’m impatient and I only bought items with a “Buy It Now” option on ebay and everything was either new or a take-off. You could probably get everything a little cheaper if you want to try auctions and/or get used items. I considered buying used, but found almost nothing available in the 8050 range when I was searching.
Refrences
My two biggest resources in this endeavor were GPLama’s videos where he did the same conversion himself and also the bettershifting.com web site, especially for cable sizing and how to design your system. For reference, I’ve listed all the parts required for a Cannondale CAAD10 size 52.
- Di2 shifters (Ultegra ST-R8050)
- Front Derailleur (Ultegra FD-R8050)
- Rear Derailleur (Ultegra RD-R8050)
- Battery (BT-DN110A1)
- Junction A (EW-RS910)
- Junction B (SM-JC41)
- Wireless unit (EW-WU111)
- Wire (lengths: 200mm, 350mm x2, 650mm, 850mm, 1200mm x2)
[I purchased all wires from Amazon] - Battery Charger (SM-BCR2)
I’ve outlined how I routed the wires and included the cable lengths for reference. This setup leaves no open port on the right shifter for climbing buttons. Not an issue for me as I never intended to use them anyway. Different bars with dedicated ports for internal routing can give you other routing options so YMMV.
Junction A –(350mm)–> Right Shifter
Right Shifter –(1200mm)–> Junction B
Junction A –(200mm)–> Wireless Unit
Wireless unit –(1200mm)–> Left Shifter
Junction B –(850mm)–> Battery
Junction B –(350mm)–> Front derailleur
Junction B –(650mm)–> Rear derailleur
Tips & tricks
For the rest of this post instead of outlining my installation I’m going to highlight some tips & tricks to help with installation. Keeping in mind every bike might be a little different. There are plenty of videos online showing the installation. I’d recommend watching the GPLama video series 1, 2 or 10 times as he nails explaining the process.
- Get the Park Tool IR-1.2 internal cable routing thingamajig. I’m not sure I would have done this without it. Yeah thread, vacuums and some wishful thinking might have done the job but this was just fast and easy. I also got the Park Tool EWS-1 electronic shift tool to aid in the installation/removal of the Di2 wires. The Shimano tool is an option, but I like the Park Tool form factor better and doesn’t cost much more.
- If you don’t have a Di2 compatible seat post (I didn’t) you will need a way to secure it inside your seat post. I chose the PRO Di2 seat post holder. There are other brands but this did the trick with my C’dale seat post. I did have to shave down the ribs for it to fit properly. Of course you could purchase a Di2 seat post but that adds more cost.
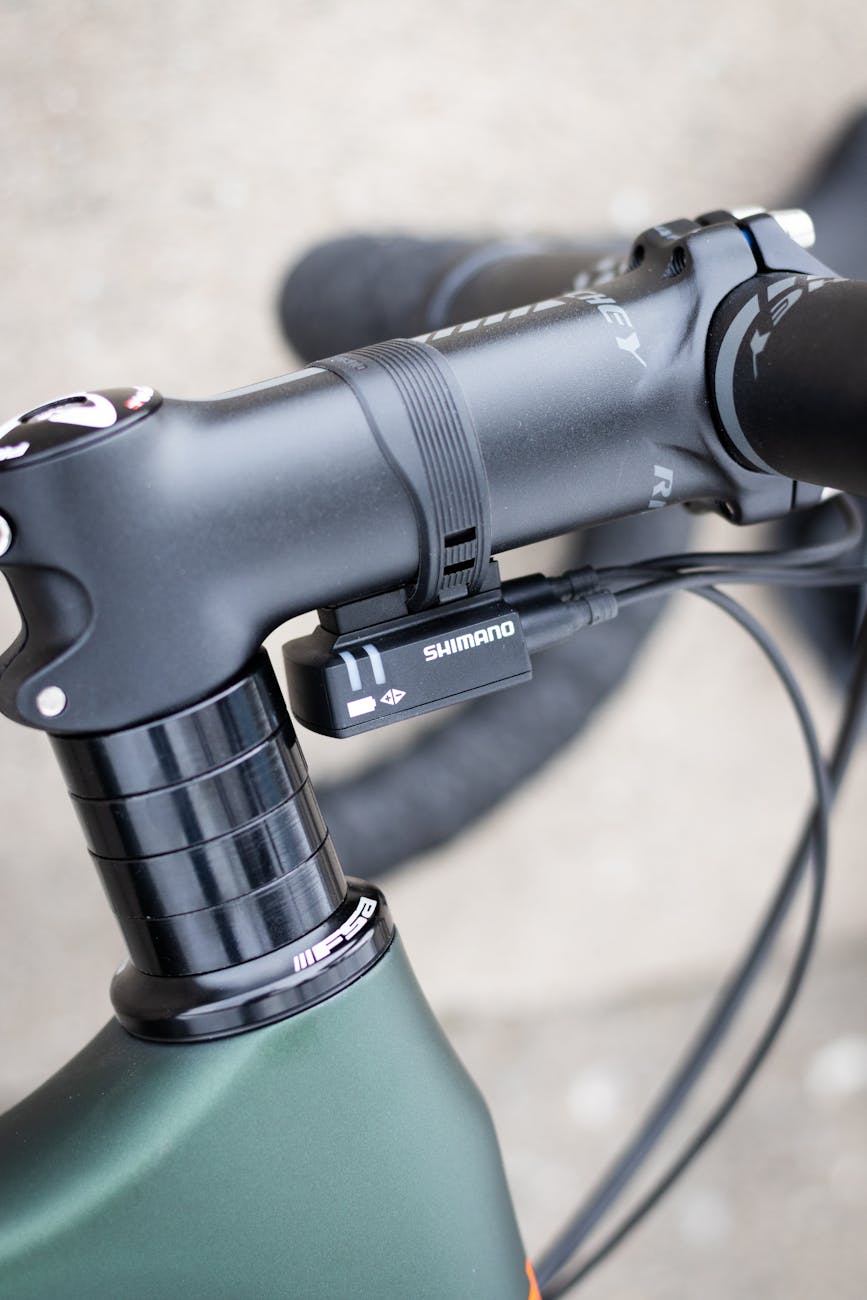
- There are 2 types of Junction A boxes you can get, under the stem (old school) or in the end of the handlebar (new school). The CAAD10’s stock bars don’t support the new school junction box, so your options are: mount it under the stem, upgrade the bars, or drill discreet cable ports. These holes need to be 5-5.5mm away from the end of the bars on the underside and should be big enough for the Di2 cable end to pass through.
Do this at your own risk! If I had carbon bars I probably would not have done this. But with the aluminum bars it doesn’t concern me as it’s in a non load bearing area. Honestly, the factory isn’t doing anything different other than having some fancy machine drill the holes. If you do decide to go this route just use a file to de-burr the holes, inside and out. Followed up with a sharpie to sorta make it look nice, not that anyone would ever see this. Also when I taped down the Di2 cable in his area, I started behind the Di2 cable, covering about half of the hole and then wrapped over the cable securing it in place. This puts a bit of tape between the cable and the hole and then secures it in place so there should be very little chance of chafing. - Connect all your Di2 items on a bench first to make sure everything works before installation. I also connected my computer to upgrade the firmware and set up the wireless unit.
- Use a pencil to mark the position of the mounting bracket on your old shifters. Pencil marks stand out on black bars, making it easier to align and position the new shifters accurately.
- Run all the Di2 wires loose first and make sure everything works before hiding everything away.
- The CAAD10 BB30 bottom bracket and no inner BB shell so there is no need to remove the bearings. The 30mm hole is plenty big enough to pass all the wires and Junction B through. This will be largely bike dependent.
- Because the CAAD10 lacks an inner BB shell, unsecured or unshielded wires can come into contact with the spindle and pose a risk. I have seen people use hot glue or tape to secure things inside the frame. With this method there is a small risk there should either of those fail as this is a blind area of the bike.
Instead I fashioned my own inner shell from a smooth walled water bottle. Not a bidon, but rather specifically a Life Wtr bottle. I cut a section of the bottle that was just under 30mm and then slit one side of it. I then coiled it up tight, passed it through one of the bearing and let it expand inside. Presto an inner shell and all wires secured out of the way. If you need to remove it, just grab one of the cut ends and pull it through the bearing, that’s why I cut it at 30mm to make the process easier. - I worked from the back to the front securing/hiding cables. Rear derailleur, front derailleur, battery, junction B into down tube (wrapped in bubble wrap), inner BB shell, then handlebars/shifters and lastly Junction A.
Wrap Up
I think that about covers my system design along with any tips/tricks I learned along the way. Other than that I just followed the Shimano derailleur installation/adjustments from the dealers manual and everything went smooth. Overall I’m really happy with how things went and shifting is superb with the new group set. I’ll report on any issues but as of right now I’m definitely a convert. Feel free to reach out with any questions and I’ll do my best to answer and with that, happy shifting!
Leave a Reply